
Get started with POS
A quick tour of Ellibo POS for restaurants and retail stores, and the setup guide that takes you from a new business to your first sale.
Ellibo POS works in any web browser, on a computer, a tablet or a phone. Your data is saved online, so you can bill on one device and check sales on another.
Restaurant or retail
When you set up your business, you choose its Business Type. POS then shows the tools that fit:
| Restaurant | Retail store | |
|---|---|---|
| Billing | Dine-in tables, pickup and delivery | In-store and delivery, with barcode scanning |
| Kitchen | KOTs, KOT stations, Kitchen Display | — |
| Staff | Waiters | — |
| Paperwork | Bills | Bills and invoices |
| After the sale | Refunds | Sales returns |
The type shows at the top left of the app, next to POS.
The setup guide
When you open POS as an admin, the Dashboard shows a setup guide. Each step ticks itself off when it's done:
- Check your business details: name, address and logo for your receipts.
- Set up your taxes: the rates you charge.
- Add your menu or Add your products.
- Set up your tables (restaurants).
- Choose how customers pay: UPI apps, wallets and the other ways you take money.
- Connect your printers.
- Invite your team.
- Make your first sale.
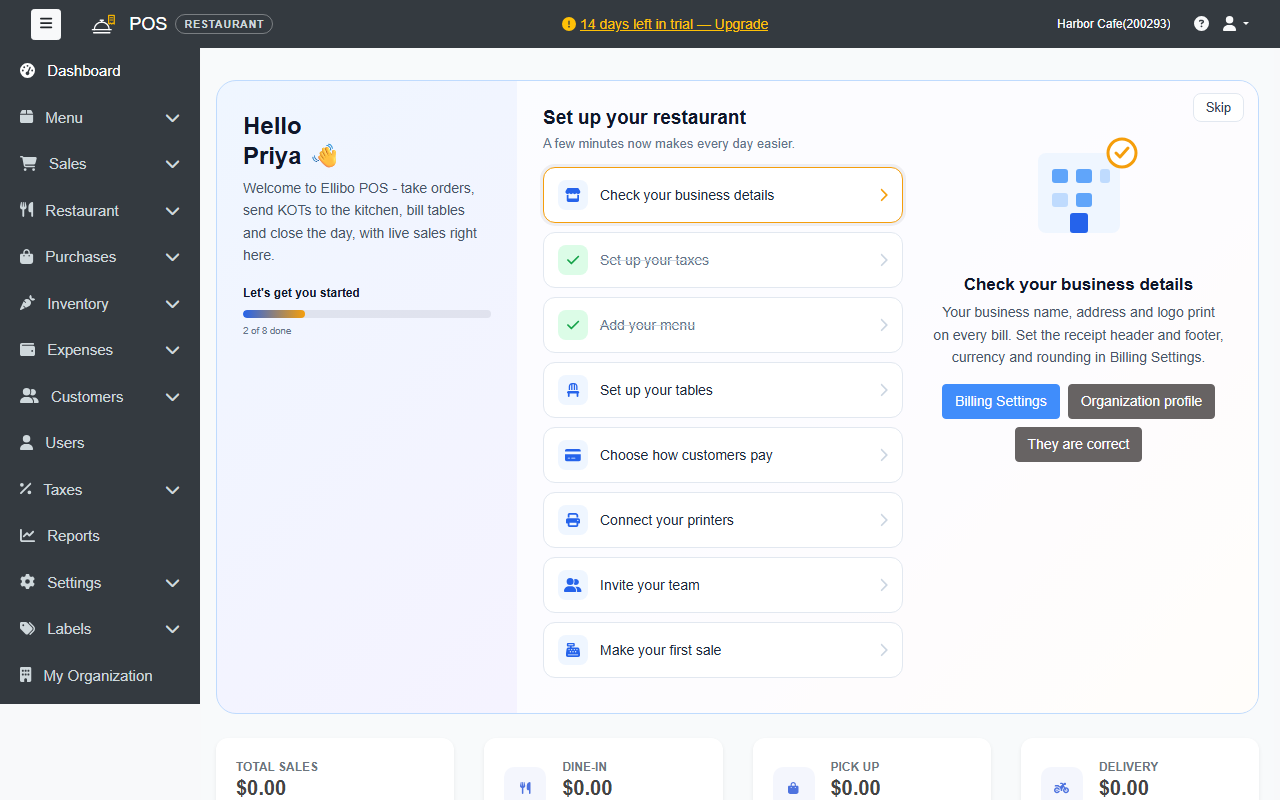
Click a step to see what it needs and a button that takes you there. Finished some steps another way? Use the button on the step, such as They are correct, to tick it off. Click Skip to hide the guide.
Find your way around
- Left menu: Menu (products), Sales, Restaurant, Purchases, Expenses, Customers, Users, Taxes, Reports and Settings. Click the ☰ button at the top left to hide or show it.
- POS: under Sales channel at the bottom of the menu. This is the billing screen. Restaurants also get Kitchen Display.
- Top bar: your plan or trial, your business name, and the account menu, where you can switch business or sign out.