
Payments and discounts
Take cash, card, wallet and pay-later payments, split a payment across methods, split the bill, and add discounts and tips.
Payment types
Choose one under the order total before you click Pay & Settle:
| Type | Use it when |
|---|---|
| Cash | The customer pays cash. Enter the amount tendered to see the change. |
| Card | The customer pays by card on your card machine. |
| Due | The customer pays later. Add the customer to the order first, so the amount shows under Outstanding Dues. |
| Other | The customer pays with one of your own methods, such as a wallet, voucher or bank transfer. |
| Part | The customer pays with more than one method, such as part cash and part card. |
Settle a bill
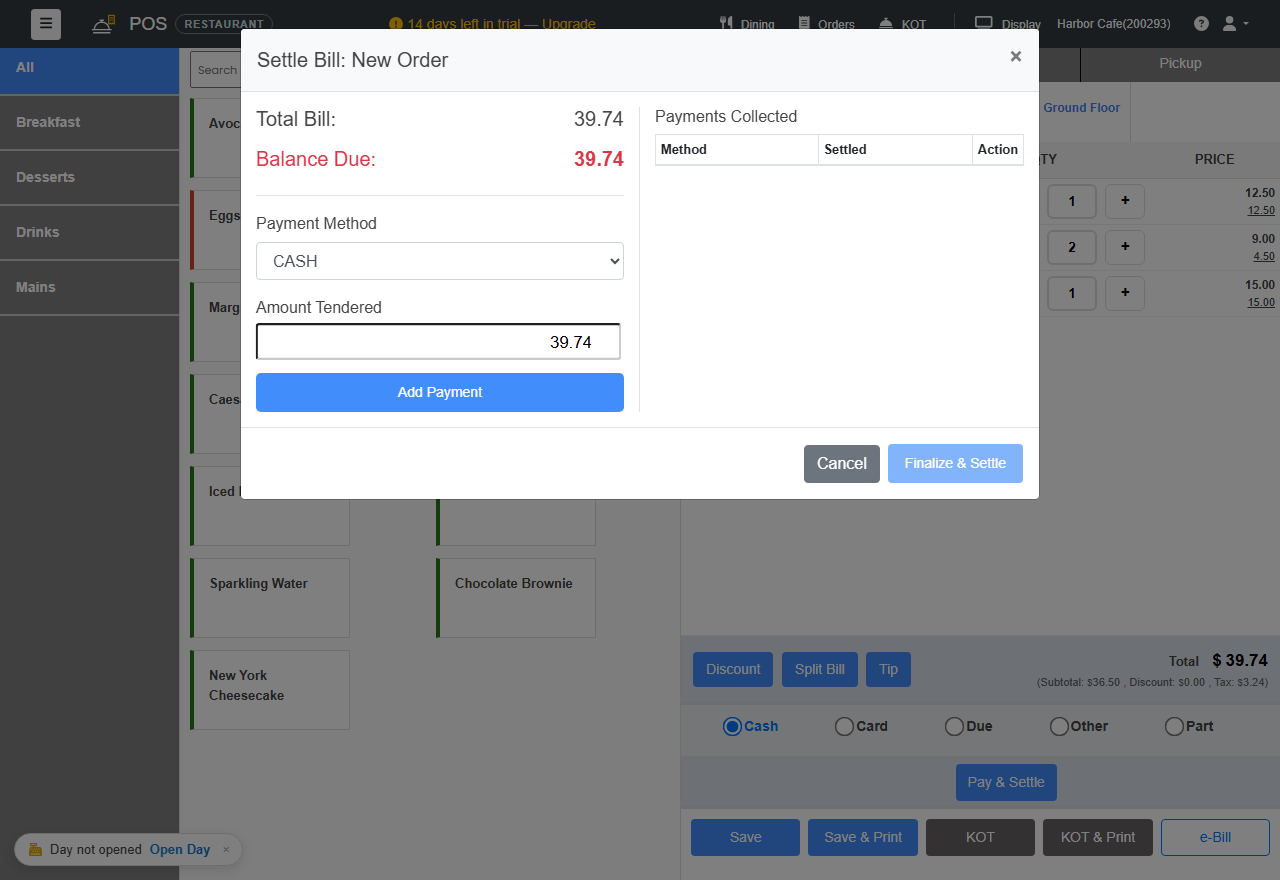
- Click Pay & Settle. The Settle Bill window shows the Total Bill and the Balance Due.
- Check the Payment Method and the Amount Tendered, then click Add Payment.
- For a Part payment, add each method and amount until the Balance Due is zero.
- Click Finalize & Settle.
The window then shows Bill Settled with what was paid. Click Print Receipt to print it, or Close to go on. To print without this step, turn on Print Receipt Automatically When a Bill Is Settled in Billing settings.
The receipt of a settled bill shows how it was paid, for example Paid By: Cash, or one line for each method of a Part payment. Your own methods show by their name, and Due shows as Due (Credit).
Add your own payment methods
Cash, Card and Due are ready to use. Add the other ways you take money:
- Go to Settings › Payment Methods.
- Under Add New Method, enter the Method Display Name, for example Apple Pay.
- Choose the Classification Type.
- Leave Allow this custom payment type in POS on.
- Click Save Changes.
Your methods appear under Other on the billing screen, and each one is counted separately in Day Close and reports.
Discounts
Click Discount on the order. Enter an amount or a percentage, then click Apply. To take it off again, click Remove Discount.
You can also set an automatic discount for every bill in Billing settings.
Discounts by customer tag: give a tag such as Corporate or Staff its own discount, and customers with that tag get it on the bill by themselves. See Automatic discount by tag.
Split the bill
Save the order first, then click Split Bill. On a tablet or phone it is under Actions. Choose one of two ways:
- Equal shares: choose how many parts, and click Print Split. Each guest gets an equal share of the total.
- By item: each guest pays for what they had. See below.
The bill stays one bill with one bill number. Splitting only changes what each guest's receipt shows; reports and taxes are not affected.
Split by item
- Click Split Bill, then By item. You see every item on the bill and two guests. Click + or − to change the number of guests, up to 10.
- Choose a guest, then tap an item to give it to them. For an item with a quantity of more than 1, each tap gives one unit, so 3 drinks can go 1 to Guest 1 and 2 to Guest 2.
- For a dish people share, click Share on it and tick the guests who share it. Each of them pays an equal part, and their receipt shows (shared by 2).
- To start an item again, click Clear. To give everything that is left to all the guests equally, click Share the rest equally.
- When every item is given out, each guest's total shows. Click Print next to a guest, or Print All.
Each guest's receipt lists their items and their part of any bill discount, service charge or other surcharge, delivery fee and rounding. These parts follow each guest's share of the items, so the guests' receipts always add up to the bill total. The receipt also shows the original bill total.
The split is saved on the bill, so you can print the guest receipts again later. When you click Pay & Settle, the Settle Bill window shows what each guest pays. Take each guest's payment as usual; for different methods, use a Part payment.
If you change an item's quantity after splitting, that item has to be given out again before you can print the guest receipts.
Tips (restaurants)
Click Tip to add a tip to the bill. Tips show separately in the Net Sales report as Tips Collected.
Service charge and surcharges
Go to Settings › Regional & Tax Settings › Surcharges to add a charge on top of the bill. Each one shows as its own line on the bill and receipt, and the Surcharges report lists them.
- Service charge (restaurants): click Add surcharge, name it, for example Service Charge, enter the %, tick every day and set Applies to to dine-in only.
- Day or public holiday surcharge: the same, for the days you choose, such as Sundays or public holidays.
- Card surcharge: a % on the part of the bill paid by card or one of your own methods.
To let managers and admins take a charge off a bill, turn on Managers and admins may waive surcharges on a bill. The bill shows that it was waived.
Check your local rules on surcharges before you turn them on.