
UPI QR and bank transfer
Let customers pay you by UPI or bank transfer with no gateway and no fee. They tell you the reference, you confirm it, and the payment is recorded against the invoice.
You don't need a payment gateway to be paid online. Switch on a UPI QR and bank transfer, and every Pay now page shows them. The customer pays you directly, and the money reaches your bank account with no gateway fee.
The only difference from a gateway: Ellibo can't see your bank account, so it can't know by itself that the money arrived. The customer tells you ("I have paid"), you check your bank, and you confirm.
Switch it on
- Open Settings › Integrations › Payments.
- Scroll to Without a gateway.
Tick Show a UPI QR and type your UPI ID (1), for example yourshop@okhdfcbank. Below it, type the name shown in the customer's UPI app.
- Find your UPI ID in your bank's app or your UPI app, under Profile or UPI ID. Use a business or current account UPI ID if you have one.
- Tick Show bank transfer details and type them (2): account name, bank, account number and IFSC. Add the branch if you like.
- Keep Customers can tell me "I have paid" ticked, and choose the bank account this money reaches (3) - the account in your books that matches the UPI ID and bank details.
- Click Save (4).
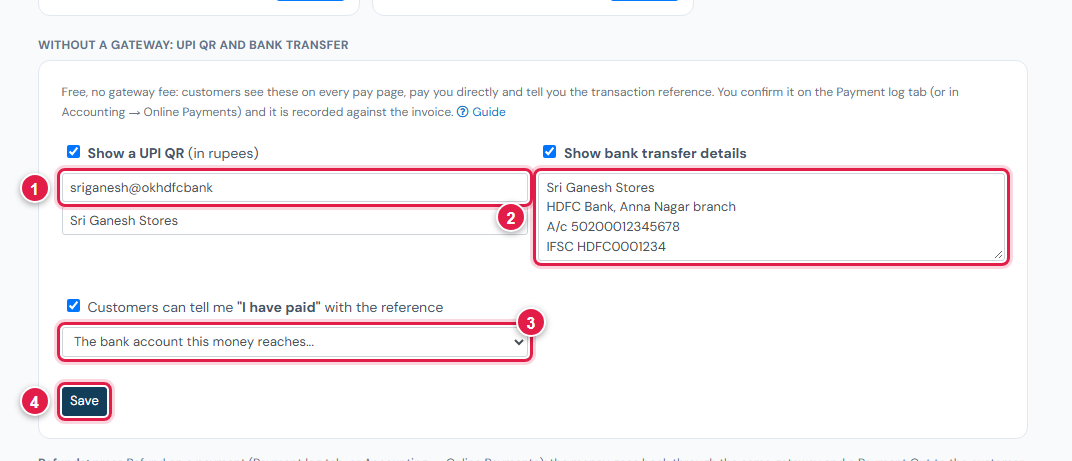
From now on, every Pay now page shows Pay by UPI (with a QR code) and Pay by bank transfer, even when no gateway is connected.
It shows for invoices in INR. For an invoice in another currency, only bank transfer and gateways that take that currency are shown.
What the customer does
- They open the invoice's Pay now link.
- They scan the QR with any UPI app (GPay, PhonePe, Paytm, BHIM ...), or tap Open my UPI app on a phone. The amount and a note with the invoice number are filled in. Or they pay by bank transfer with the invoice number as the reference.
- Back on the page they open I have paid by UPI or bank transfer, enter the amount paid (1) and the UTR / transaction reference (2) from their UPI or bank app, and click Tell … I have paid (3).
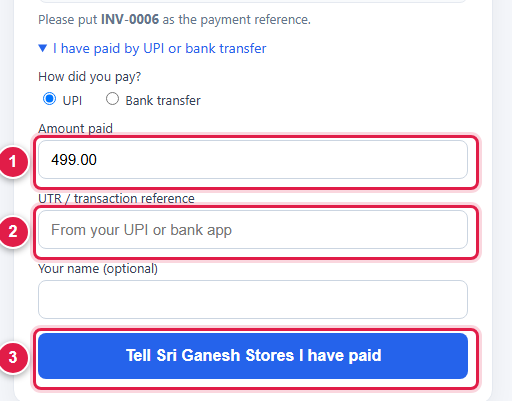
The page then says you're checking it, and that they don't need to pay again.
Confirm the payment
The Payment log tab shows a count on its name when something is waiting. To confirm:
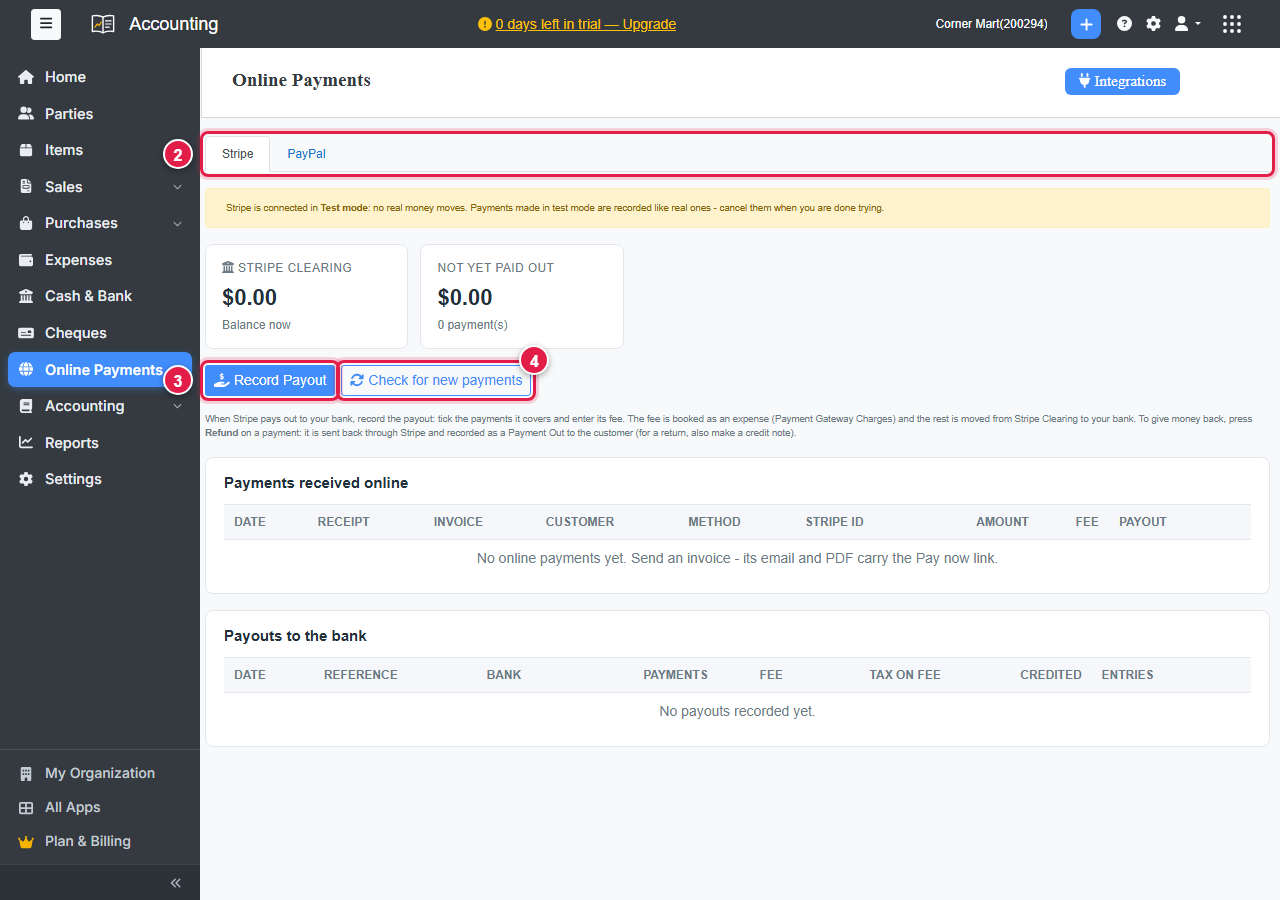
- Open Accounting › Online Payments. Customers say they have paid lists each message with the invoice, the customer, the UTR and the amount.
- Check your bank statement or UPI app for that UTR number and amount.
- Under Reached, check the bank account is right.
- Click Confirm. A payment receipt is recorded against the invoice, and the Pay now page shows it as paid.
- If the money never arrived, click Not received. The invoice stays unpaid. Contact the customer.
Anyone whose role in Accounting allows confirming payments (admins can always). Set it in Accounting › Settings › Roles & permissions.
Turn off "I have paid"
Untick Customers can tell me "I have paid". Customers still see your UPI QR and bank details, and you record their payments yourself in Accounting, as for any bank payment.
Good to know
- UPI and bank details are shown to anyone with the invoice's link. Use a business account.
- Confirmed payments are normal receipts. You can match them in bank reconciliation.
- You can use this together with gateways: customers see both and choose.